Fix WiFi not Showing or not Available in Windows 10
 A WiFi feature is one of the most essential features on PCs. It is because most people rely on the internet to work and study. If you are a user of Windows 10, you probably have faced a problem with your WiFi. The main cause of this problem is an error on the hardware or driver. In order to fix WiFi not showing or not available in Windows 10, there are some ways that you can do it. Here they are.
How to Fix Windows 10 Wi-Fi not showing up
1. Reset Your Wi-Fi
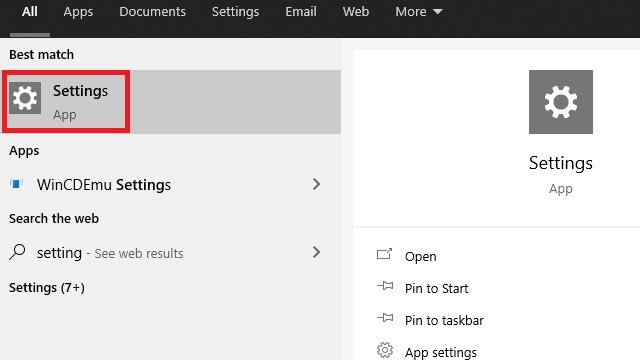
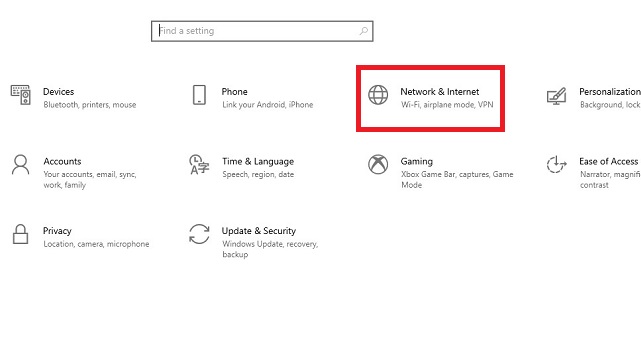
Not many people know this effective way to fix their WiFi on Windows 10. Resetting your WiFi will return your WiFi to the original/default settings. On the search bar, type Settings then enter -> click Network & Internet setting. After that, click Change Adapter Options. Click the WiFi connection, then click Disable This Network Device. Once you have disabled it, activate it again by clicking Enable This Network Device. Now, try to turn your WiFi on again and see whether you manage to fix the problem or not.

You can also reset your WiFi in another way. Press the physical WiFi button on your PC or laptop. Wait for a few minutes before you press the button again. Then, wait until your WiFi is active again and see whether the problem is solved or not.
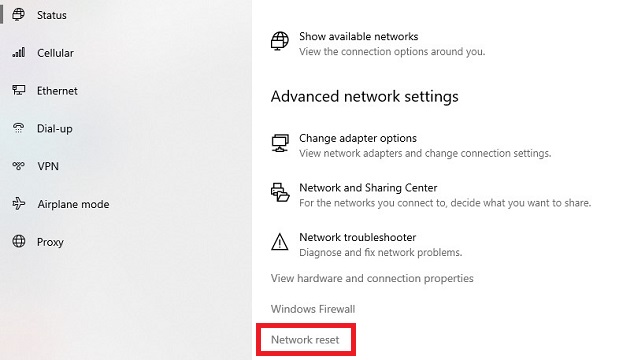
2. Reset Network Settings
Still in the same place, scroll down the mouse and find Network Reset settings, another way, on the search bar, type Network Reset then enter, click Reset Now and your PC will be restarted. This will remove and then reinstall all your network adapter, and set other networking components back to the default setting. You might need to reinstall other networking software afterward.
3. Reset Your Wi-Fi Through Device Manager
The next way is resetting your WiFi through Device Manager. This way is actually quite similar to the previous way. On the Device Manager, there are actually various driver devices installed in your PC or laptop. These drivers included drivers for WiFi. Right-click the Windows Start button, then select Device Manager. Look for your WiFi driver and disable it; right-click the WiFi driver and select disable. Then, enable it again. After that, try to turn your WiFi on again.
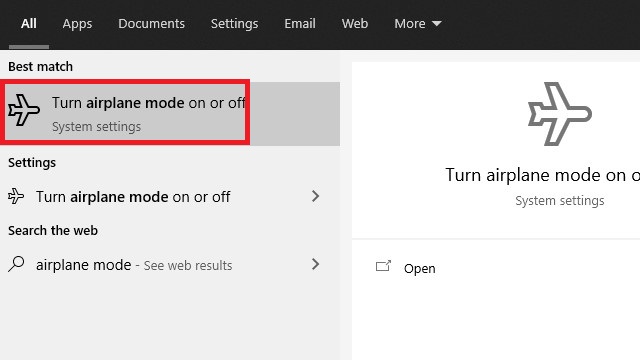
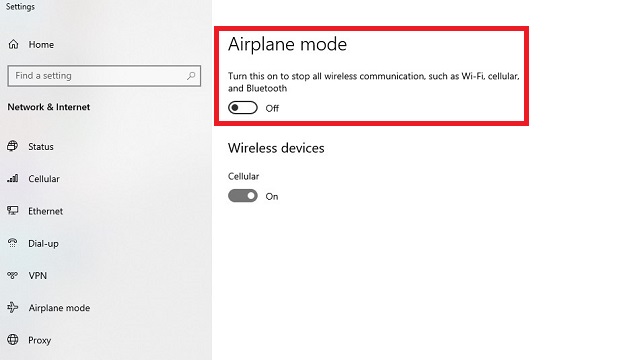
4. Check the Airplane Mode
Last but not least, check the airplane mode. You must already know that the airplane mode is a feature that can disable networks. You frequently see it on smartphones. But, you can actually also find this feature on Windows 10. And some people accidentally turn this mode on. What you have to do is disable airplane mode by clicking the WiFi button on the taskbar, then choose Network Settings. Scroll down and click Airplane Mode. After that, disable the mode.
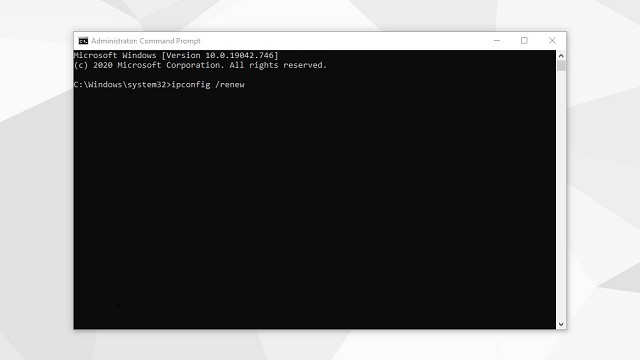
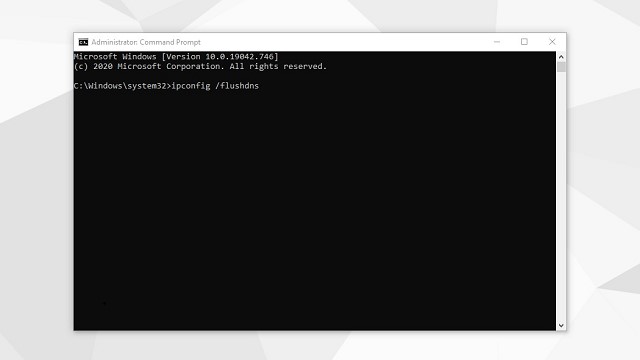
5. Run Network Commands
Make sure WiFi is turned on, if it isn’t, select it to turn it on. In the search box on the taskbar, type Command prompt. The Command Prompt button will appear. Right-click your Mouse, run as administrator, click Yes.
At the command prompt, copy and paste run the following commands in the listed order, and then check to see if that fixes your connection problem:
- Type “netsh winsock reset” and select Enter. Without quotation marks
- Type “netsh int ip reset” and select Enter.
- Type “ipconfig /release” and select Enter.
- Type “ipconfig /renew” and select Enter.
- Type “ipconfig /flushdns” and select Enter.

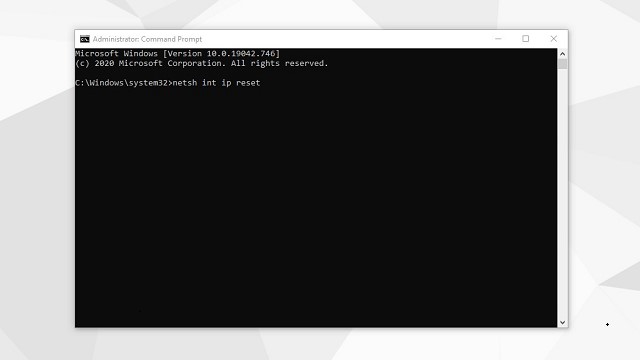

Reboot your PC.
Conclusion
Those are the ways that you can try to solve problems when your WiFi is not showing or available on your Windows 10 PCs. If you are still having problems, you can comment below.